Showing posts with label Tutorial. Show all posts

Tuesday, January 8, 2013

Diaper Sprayer/ Bidet

Since our little sunshine started solid foods, a diaper sprayer for the toilet was high up on my want list :)
We found a great link for a DIY diaper sprayer here, but after looking at it and several other DIY options (along with reviews of those who tried them) and decided it was worth the extra $10 to just buy one.  I'm sure it works great for some people, but this is one of those times we decided to just spend the extra money to save us some time.  So we picked one up.  They have it on Amazon as well as local home improvement stores.  We found ours at Home Depot for about $40.

Mini-Shower - Bidet & Multi-Use Hand Held Sprayer 

It has great instructions that come with it.  Just follow those.  However, we did have to do one additional step.  It says to make sure you have a flexible supply line leading into the toilet.  Ours wasn't.  


We actually had to go up a couple sizes in the flexible supply line.  They didn't have any short enough, so we had to go extra long so we could make a loop as seen below.

It was a pretty simple switch, just unscrewing and screwing the new one on. Just make sure you turn off your water and then flush to empty the toilet basin, but have rags ready to clean up the little that is there!

It has a shut off valve to the sprayer so that helps with the whole worry that the kids will discover they have a never ending water gun!

Just make sure you face it the right way! When my hubby tested it out he had it pointed at the ceiling!  That's a big spot for being 10 feet away!

Tuesday, November 27, 2012

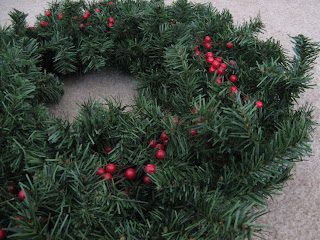
Designer Wreath Tutorial

I don't know about you, but I find those cheap wreaths a little scrawny.  But they're such a good price.  Here's how to get the look of those big fluffy wreaths for the cost of the small ones.

I picked up a 24" wreath from Michaels, but you could do dollar store or walmart has them for $4.  The tag says it's $7.99 but it was (and usually is) on sale for $5.  The smaller ones are $3 but the bigger ones are never on sale before the holidays (not that I've seen at least)


I also picked up a garland for $5 at Michaels (again, check dollar store and walmart for even cheaper options) and some holly sticks from JoAnn's at 50% off.  Because I do everything on a dime, I used twist ties, but you could use wire (I had some as back up, but this worked great!)  You'll also need something to cut wire with. 

Wrap the garland around the outside of the wreath.

Position it so it looks good from the front because we'll be working on the back for a bit. 

After carefully flipping it over begin tie it off.  Using wire or a twist tie, tie off the beginning of the garland. I used a yellow twist tie here so I could find it easily if I needed to.  Because it's at the back, you can't see it at all.  Keep the garland wrapping around the outside edge and tie off a few more places (it didn't take many)

Pull it snug so there are no gaps and tie it off until you get to the end.  Pull the end back towards the wreath frame to disguise the end.  Tie it off with another twist tie or wire.

Position the berry branches around.  I used 5 so they would overlap some.  Or use whatever you want to decorate at this point.


A few inches down from where berries split from the branch secure with wire or twist tie.

 Snip off the end of the branch.  Squeeze tight and bend the branch back and forth slightly.  Then use a small piece of the wreath to cover the twist tie.

Repeat all the away around with remaining branches.

Fluff and adjust until it looks just right. 

 I used some of the wreath's branches to bend over the holly to secure it a little bit more, but not too much.  I didn't want it flat inside the fluffy wreath.


Now hang!  I like to use fishing wire to hang mine.  It's doubled up a couple times and hung from a command hook on the other side of the door.

 Merry Christmas!

How do you like to decorate your wreaths?